Prerequisites:
For the Management Server you need to have .NET 3.5 and .NET 4.0 installed as well as enabling the remote registry service and installing Microsoft Report Viewer 2010
For .NET 3.5
Open Server Manager
Click on Features
Click Add Features
Check the box for .NET Framework 3.5.1 Features
You will be prompted to install:
Web Server (IIS) and Windows Process Activation Service
Click Add Required Role Services to continue
On Web Server (IIS) Click Next
On Select Role Services Click Next
On Confirm Installation Selections Click Next
For .NET 4.0
If you don't already have a copy of .NET 4.0 you can get it from Microsoft.
Run the .NET 4.0 executable
Check I have read and accept the license terms
Click Install (this will take a few minutes depending on the specs of the box)
Click Finish
Services:
The Remote Registry Service needs to be enabled and running before you start the install. It is disabled by default
Start > Administrative Tools > Services
Scroll down to Remote Registry Service, Right Click, Properties
In Startup type: Change to Automatic and Click Apply
Then Click Start
Then Click OK
While you are in Services, double check to make sure your SQL Server Agent Service (for instance) is started.
For IIS:
Open Server Manager
Click on Roles
Click Add Roles
Check Web Server (IIS) and Click Next
Click Next
Under Role Services, Select the following:
- Static Content
- Default Document
- Directory Browsing
- HTTP Errors
- HTTP Logging
- Request Monitor
- Request Filtering
- Static Content Compression
- Web Server (IIS) Support
- IIS 6 Metabase Compatibility
- ASP.NET
- Windows Authentication
Review your selection and Click Install
Once IIS is installed, go ahead and open it up.
On the Server home page Double Click on ISAPI and CGI Restrictions
Select ASP.NET 4.0 (either x64 or x86 depending on your server)
In Actions Click Allow
Installation:
Lets get started with the install. Right Click on Setup.exe and Run as administrator. You should be familiar with this screen by now. Click Install

Select Web console and Reporting server. Click Next
*Note - These roles do not need to live on the same server but if you install them together you can access reporting services from an Internet Explorer window which can be beneficial depending on the needs of your organization. I typically install them together.

Choose your install location and Click Next
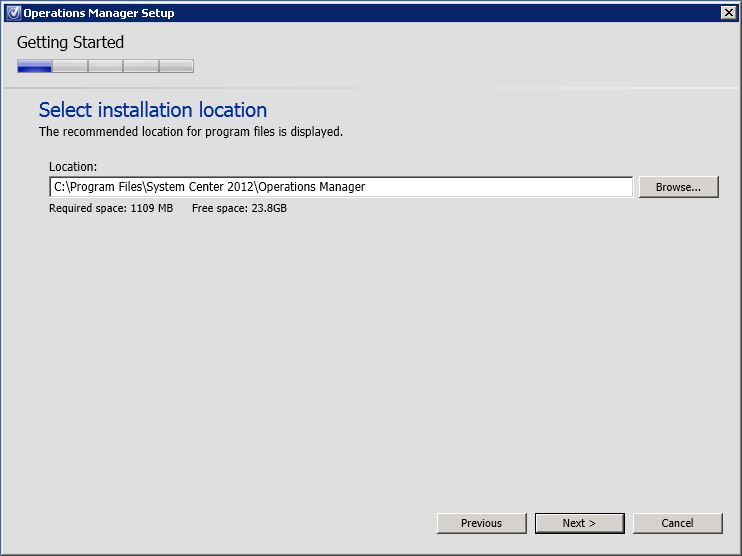
Install will verify all prerequisites. If there are any issues you will need to resolve them before continuing. Click Next

On the Specify a Management Server page enter the FQDN of your RMS box. Click Next


Unless you configured an alternate website for Web services the Default Web Site will be selected. At this point you may get an error that says the Web console does not have sufficient access to the operational database. This is OK. You will be able to complete the installation without issue. The only thing that won't work is the web console will not be configured for .NET Application Monitoring. To resolve this run the following command on your Operational and Data Warehouse database instances after this install finishes.
EXEC [apm].GrantRWPermissionsToComputer N'[LOGIN]The local and remote parameters are as follows:
For local installation, the LOGIN is: IIS APPPOOL\OperationsManagerAppMonitoring
For remote installation, the LOGIN is: Domain\MachineName$
Click Next

Since this site is going to be Intranet only I selected Use Mixed Authentication. Depending on your situation you might want to go with Network Authentication. Make your selection and Click Next

You will need to provide the Data Reader service account. Click Next

On the Help improve System Center screen, the choice is yours. Select what you want and Click Next

On Automatic Updates I generally turn this on. Make your selection and Click Next

On the Installation Summary page review your install choices and Click Install.

Install takes about twenty to thirty minutes depending on the speed of your machine.

One final thing that needs to be done is to configure permission inheritance for the web console.
Navigate to the installation directory, C:\Program Files\System Center 2012\Operations Manager\WebConsole\MonitoringView (by default).
Right Click on the TempImages folder and select Properties
On the Security tab, Click Advanced
On the Permissions tab, Click Change Permissions
Select Include inheritable permissions from this object's parent checkbox
In Permission entries, Click Administration then Click Remove, do the same for System then Click OK
Click OK to close Advanced Security Settings for Templates and then Click OK to close TempImages Properties
More to come!
No comments:
Post a Comment